Load and Save Instructions for Data Cassette on Roland Jupiter-8
Midi Tips June 13th, 2007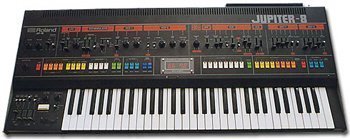
To SAVE a complete set of 64 patches and 8 patch preset pairs:
A- Press the JP-8 dump button. The JP-8 will send a pilot tone to your tape recorder, indicated by a double dash (— —) in the patch number display window. If possible, adjust your tape recorder so that the pilot tone registers near 0dB.
B- Begin recording with your tape recorder, beginning with a clear portion of the pilot tone. The JP-8 will soon produce a modulated tone and indicate which patch numbers are being dumped at any given moment by displaying those numbers in the lower portion of the display window.
C- When the Jupiter-8 has dumped it’s entire memory (ending with the number 88) the pilot tone will appear again then drop to silence and the display window will become blank to indicate the end of the dump sequence. Record enough of the silence to separate different JP-8 program memories to the same tape.
The Jupiter-8 includes the ability to assign a file number to each set of programs dumped, to make later identification easier. Merely select one of the 64 available patch numbers and place it in the upper section of the patch number display window before the dump procedure is begun. This number will be memorized along with the rest of the JP-8 memories and will be displayed in that position whenever the tape memory is played back into the Jupiter-8.
The Jupiter-8 includes a verify function to allow you to check the accuracy of your tape recorded memories before you change any patches in the Jupiter-8, providing extra securing against accidental loss of your precious programs.
To VERIFY a complete set of 64 patches and 8 patch preset pairs:
A- Play back the recorded set of JP-8 programs at a relatively high level, adjusting the tape recorder output until you obtain the brightest and most continuous signal from the JP-8’s data check LED. Once you have made your adjustments, begin tape playback with the pilot tone and press the JP-8 verify switch.
B- If your recorded memory is accurate and is being played back clearly and at the correct level, the JP-8 will now proceed to display all 64 patch numbers in sequence as it did in dump mode. If the entire sequence is completed, the tape memory is accurate and secure.
C- If there is an error in your recorded memory or it’s playback, patch number of upper section of the display window will begin to flash intermittently. Return to the beginning of the verify procedure, check your tape recorders levels and connections, and try again. If an error is indicated again, repeat the dump procedure again. Continue until your tape passes the verify test.
To LOAD a complete set of 64 patches and 8 patch preset pairs:
A- Adjust the tape output level according to the JP-8 data check indicator. Once this adjustment has been made, begin tape playback with the pilot tone and press the JP-8 load switch.
B- The JP-8 will indicate the file number of the program being loaded in the upper portion of the display window, and the patch numbers being loaded at any given moment in the lower portion of the display window. When the entire sequence has ended and the display window becomes blank, the load procedure is complete and the Jupiter-8 may be played normally using the new set of programs.
Hit Dump (verify, load) key to quit dump operation.
If errors have been detected, the display window keeps the flashing patch number until you hit any key.
The Jupiter-8 tape memory section includes some special features which make the tape memory more useful. Any bank of patches (such as the teens, twenty’s, etc) may be dumped, verified and loaded by itself or in combination with any other banks. This allows specific parts of any Jupiter-8 program to be stored or recalled without effecting the rest of the programs. This procedure is exactly the same as dumping, loading and verifying with one simple addition. Immediately after pressing the dump, load or verify switch, press the patch number switches for the bank or banks you wish to include. This will limit the process to the banks you have chosen.
If you wish to load specific parts of entire programs you have dumped into tape, it is even possible to drop into that program and load that information into any new banks you wish. To accomplish this, begin the verify procedure. The instant before you reach the specific patch number you wish to begin loading, press the load button and then the bank of sounds you wish to load. The Jupiter-8 begins loading at that point.
The patch preset memories are dealt with as a group and are the first items loaded, dumped of verified in any of these procedures. Remember that these memories are pairs of numbers referring to patches within the 64 patch memories, not a separate set of patches.
When you are completely finished with the tape memory section of the Jupiter-8, always return to the memory protect switch on the back panel to the “ON” position so that the LED indicator on the front panel is lit.
Need new sounds for your Jupiter? We have a cool collection of sounds for your Vintage Jupiter-8. 64 new patches on data cassette or WAV file download. That will get your Jupiter back on it’s feet again or give you some new sounds to work with. More info can be found At The Jupiter-8 Section Of Our Web Site

Recent Comments