Korg Kronos Tutorial – Creating New Drum Kits Using Custom Samples
Midi Tips August 20th, 2012When programming our Kronos Hit Factory collection, I created six new drum kits using new samples. I quickly found out that there are several steps involved in creating the drum kit and that they all must be done in the right order for everything to work as planned. I figured it would be a good idea to take some notes!
First assemble all your wav samples into one folder. My kits all contain 88 samples and I’ve mapped each sample to one note across the entire 88 note keyboard. The samples that make up the kit usually consist of several kicks, snares, toms, open and closed hi hats, ride and crash cymbals and assorted percussion. Then depending on the style of music your making you can do just about anything. A typical Hip Hop Drum Kit would also have voice samples, orchestra and horn hits, noises, scratches etc.. After everything is prepared your ready to start.
1- Save your folder with the wav samples to your USB hard drive or memory stick. Connect your drive/stick to the Kronos USB port.
2- Choose “disk”, find your USB drive and then your wav folder. Choose your folder and choose “open”. Choose “multiple select”, select all your files and choose “load”. All your files will load in a few seconds.
3- While still in disk mode choose the save tag at the bottom, then choose the save arrow on the top and choose “save sampling data”. You are now about to create a Korg .KSC file – which will save all your samples into one easy to load file. Name your .KSC file, choose “all samples” and then choose OK. Depending on how many samples you have and how fast your drive/stick is, it should take a few minutes for all the samples to be saved to your drive or stick.
Note: There are a couple of different methods of saving your KSC file, depending on which OS your running. To be able to use the best features, including creating your own “User Sample Banks” that will stream from the Kronos SSD, you need to be running version 2.0.2 or later. We recommend that you update to the latest Kronos OS whenever a new OS is available at korg.com. Please check page 154 on your Kronos Operation Guide pdf file that comes with the 2.0.2 download folder for more info on saving KSC files. The 2.0.2 OS will also let you transfer the sounds via ftp in certain set ups. Check your Kronos manuel for more info.

After you have saved the file, remove your drive/stick from the Kronos, connect it to your computer and copy the .KSC file to your computers hard drive. Then you will have a back up in case anything happens to the file on your external drive or stick.
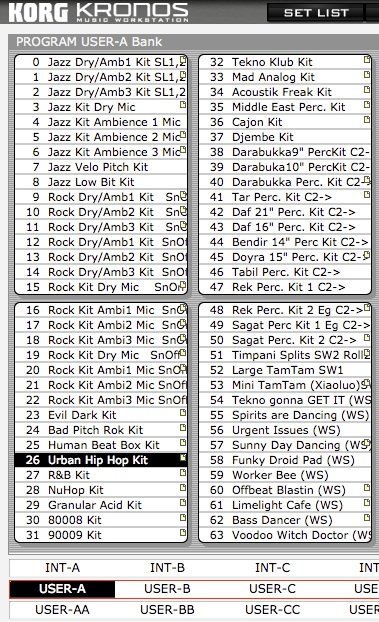
4- Go to Program Mode and pick any of the factory drum kits. You can find them in the INT-F and USER-A banks. Pick the one that comes closest to the style of drum kit that you want to recreate with your new samples. For this example, lets stick with the Hip Hop style and pick Program UA-026 – Urban Hip Hop Kit. Choose the main arrow and choose “write program”, rename it “My Hip Hop Kit” and write the kit to any empty program slot in your Kronos. Essentially you are making a copy of the Urban Hip Hip Kit to work with so you will not change the original program.
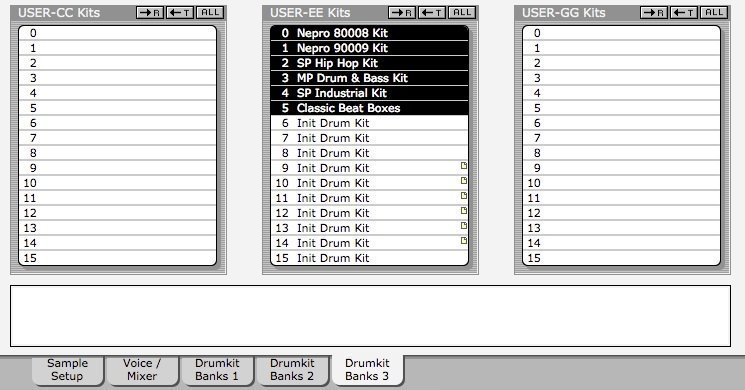
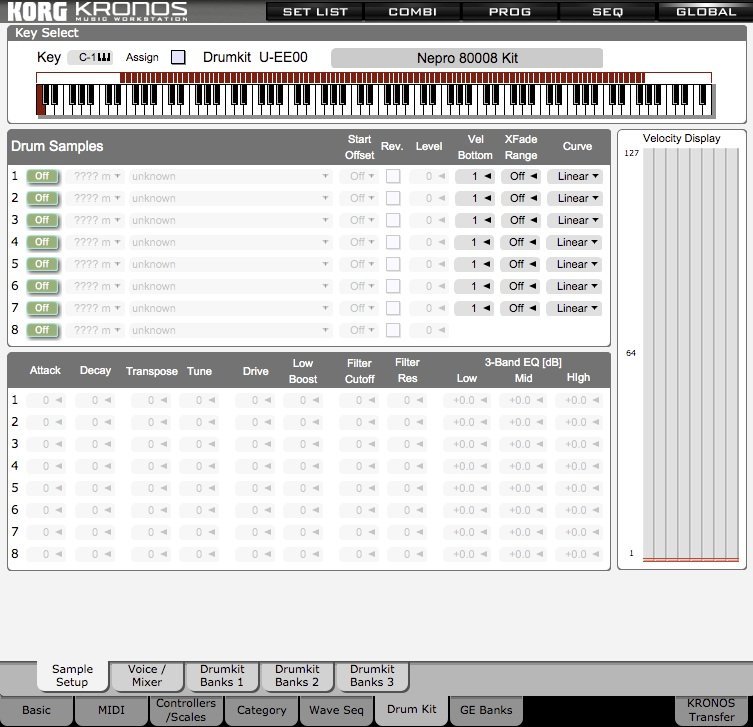
5- Go to the “My Hip Hop Kit” program that you just created in the empty slot and go to “global/drum kit”. On the top/left arrow your should see – Urban Hip Hop Kit. Highlight it. Under Drum Kit choose the next empty drum slot. It should be C06. Under the “sample setup” arrow choose “write drum kit”, then choose OK.
If you have done everything correctly the Urban Hop Drum Kit will now get written to C06. Go back to your kit and choose “rename”, give your kit a new name (something like “my hip hop kit”), choose the sample setup one more time and choose “write drum kits”, choose OK and your new drum kit has now been added into the Kronos internal memory.
Now your almost ready! But first, go to Program/OSC/Pitch to change the multi sample to your new sounds.
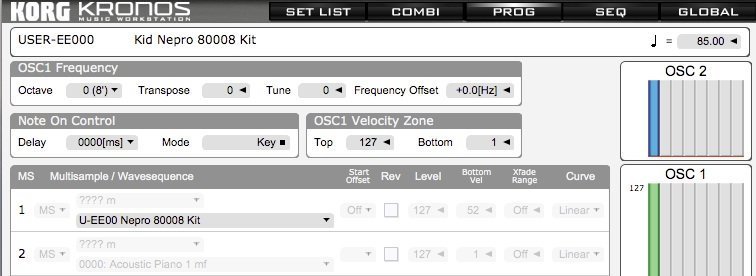
6- Before you start to assemble your kit, you must do one more very important thing. Go back to program mode, find your new “My Hip Hop Kit” program and under OSC/Pitch change the “multisample” from “Urban Hip Hop Kit” to “ My Hip Hop Kit”. Under the main arrow choose “write program” and your all set. If you don’t do this and then begin editing your kit you will be changing the settings on the factory Urban Hip Hop Kit and any program or combi that uses that kit will also change therefore creating a big headache for you!
Fear not. If you happen to change one of the factory kits you can always reload the factory settings.
7- Go back to Global mode – Drum Kit and now your ready to begin assembling your new drum kit. Start with Key A0 if your working on a 88 note keyboard or C2 if your on a 61 note – 5 octave keyboard. You can have up to eight samples on each note. Each with different velocity settings if you wish, Just change the ROM Mono Setting for each sample to RAM Mono if your new samples are in mono or RAM Stereo if they are stereo samples. There are several parameters that you can tweak for each sample to get the sound just the way you want it.
One last thing to note is which samples to put on which keys. This is important since the Kronos internal drum patterns and GE’s use midi note numbers to trigger the samples in each pattern. The easiest way to deal with this is to go through each sample one at a time and simply replace the factory sounds that’s in the Hip Hop Kit to a similar type of sound in your new “My Hip Hop Kit”. In other words, if there is a kick drum on note C1 of the factory kit, then replace the factory kick drum with one of your custom sample kick drums. A snare would replace a snare and so on. Doing this will assure that everything will sound right when triggering your new kit with the factory drum patterns or GE’s.
After you have done some editing don’t forget to again go to the sample set up arrow and choose “write drum kit” to save your new kits changes into memory. Then for safe keeping go back to media mode and save your program and user drum kit as a PCG file. Don’t forget to choose “user drum kits” and the User Bank you have stored the kits into when saving your PCG file.
Remember that while the PCG file stays in memory until you load in something else, you must load in the KSC file each time you power up your Kronos. Just load in the .KSC file that you created with your new samples and you should be ready to start making beats in a couple of minutes. You can also solve this problem by saving your KSC to the Kronos internal hard disk and setting your KSC file to autoload when Kronos starts up. That’s all done in global mode and makes it even easier to start working right away.
If you need any info please contact us at: support@kidnepro.com or just post a reply on our blog.
More info on all our Korg Kronos sounds CLICK TO ENTER OUR WEB SITE.
3 Responses to “Korg Kronos Tutorial – Creating New Drum Kits Using Custom Samples”
Leave a Reply
You must be logged in to post a comment.


December 20th, 2014 at 3:00 am
wow. seems complicated. but i will try with some samples i have this weekend. it would be nice to use my own sounds along with the preset sounds. i just got a Kronos X last month.
December 20th, 2014 at 8:20 pm
its too bad that i can’t just copy my files-folders and paste them to the Korg Kronos X drive. it would be so much simpler. it would be great to get my own sounds in it and not have to use preset drums all the time. but Korg makes it difficult. some of my folders aren’t working on it. but it does play the individual sounds. not getting it.
August 22nd, 2016 at 9:10 pm
Is there a way to do snare rolls in the Korg Kronos Karma module.